VADE'S RG Project DAY 2: Deconstruction
The easiest way to refinish or modify a guitar is to have someone else do it. Barring that as an option, you want to break down the instrument into the most number of parts possible to increase the likelihood of losing some by the time you think you’re finished. This will make all of your friends (( and readers of your Blog )) laugh at you and laughter is the best medicine. . . And daddy NEEDS his medicine…
Tools suggested for this stage are:
-Large Phillips Head Screwdriver
-Small Phillips Head Screwdriver
-Set of Allen Wrenches* (or allen “keys” if you prefer)
((also called “hex” wrenches or keys))
-Wire Snips or Pliers with a cutter… you know the type
-Pocketed Apron (to make you feel like a craftsman. Also because I think it looks funny & cute at the same time. . . And also because it gives you a place to hold all your little bits while you work. Okay, okay, you don’t really need this at all but I impulse-bought one for like a buck and thought it actually came in pretty handy. Plus it’s white canvas so you can draw or write swear words on it.)
* a note on Allen Wrenches:
if you don’t have a set of these, consider taking your guitar with you when buying them to find what type you need via a test-fit in the tool department. There are two different types: “Metric” & “S.A.E” and wouldn’t you feel dumb if you bought one kind but get home to find you need the other? Gas-waster to boot. Knowing I would undoubtedly get the wrong thing, I strolled right into WalMart with guitar in hand (black leather jacket & sunglasses optional, but recommended if you like to get lots of interesting looks… it’s a winning combo) and fumbled with the different Allen Wrenches till I found what I needed. What I can now suggest to you is to ignore those really nice swiss-army allen wrench sets that keep everything neat, tidy & together. For most people, they’re likely worth the 5-15 bucks but while fitting for the various hexes holdng my guitar together, I realized that the handle of these nifty tools hinders (( at least in the case of an Ibanez RG )) access to the truss rod hex. So you’d basically buy this for your trem system and still need an ordinary set for your truss rod. The added upstroke here is that while these folding Hex Sets (which are either Metric -OR- S.A.E.) run upwards of three Lincolns, a 16 piece Hex Key set including both types was (( at time of writing )) a whopping 84 cents.
YOU do the math.
Off the bat, I removed the plastic cavity covers from the back since I’d already taken off the truss rod cover in WalMart.
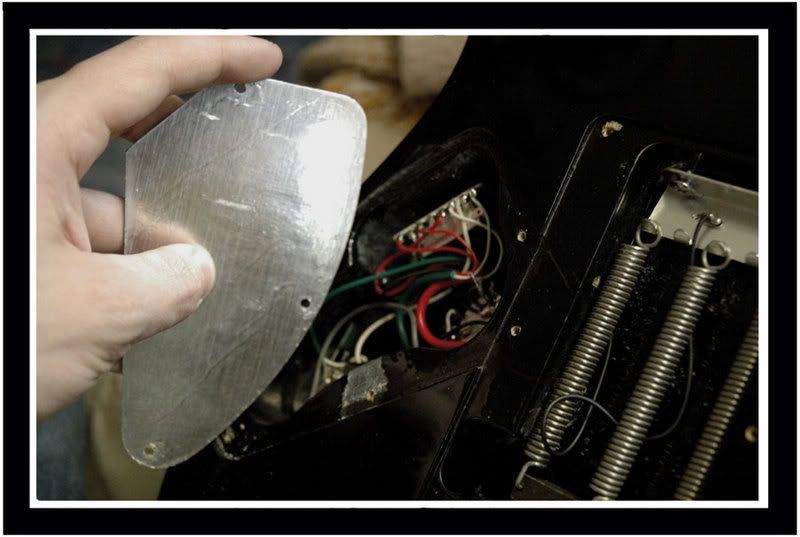
And in the process of that, I was surprised to find that the cavity plate over the pots was shielded with a foil coat. Maybe not that big of a deal, but none of my basses ever came with shielded covers, so I thought it was a nice touch. Nice Work, Ibanez ((of Korea))!
Next, I loosened the tension on my truss rod. (( righty-tighty, lefty-loosy )) I don’t know that this is standard practice, but it seemed a pretty good idea prior to cutting all the strings off and eliminating the reverse tension on the truss rod in all of 4 seconds.
And speaking of string-cutting… that came next.
TWANG!
Heh heh heh…
And now I realize that every single thing I pulled out, lifted up, unscrewed or cut off has been photo-documented. But isn’t that kind of boring? Do you really need me to say “Next I did this” and “Next I did that” for everything? Probably not. I bet you’re a clever little monkey.
I’ll tell ya what. Let’s split the difference, shall we? I’ll put up some of the better pics and caption them and you’ll be grateful that I actually found a way to be a little less verbose for once. (( don’t get used to it. ))
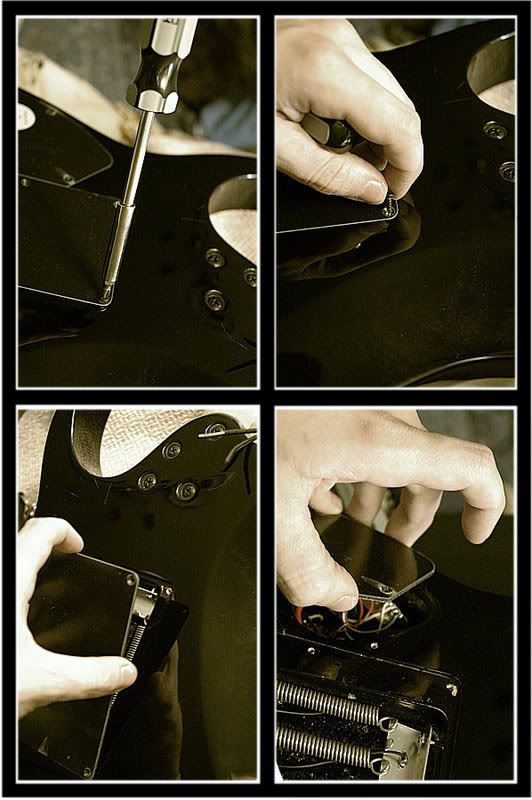
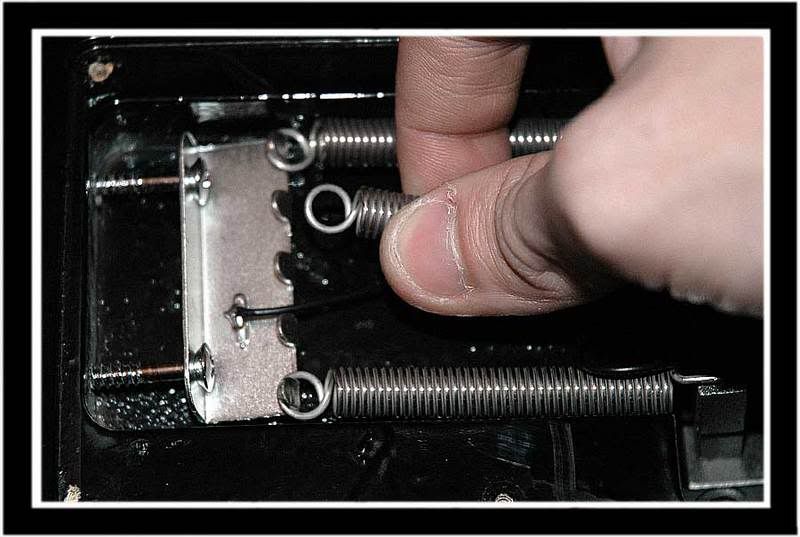
Removing trem-springs after loosening metal plate
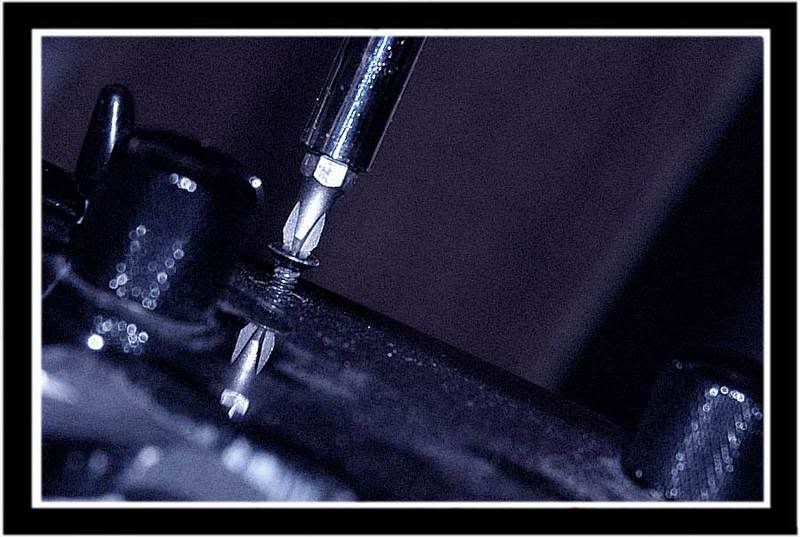
Lots of tiny screws... this one holds the pickup selector switch
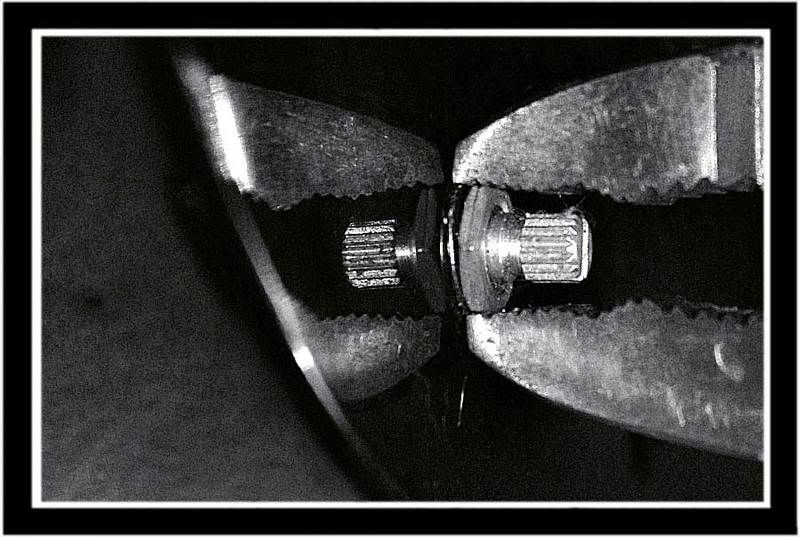
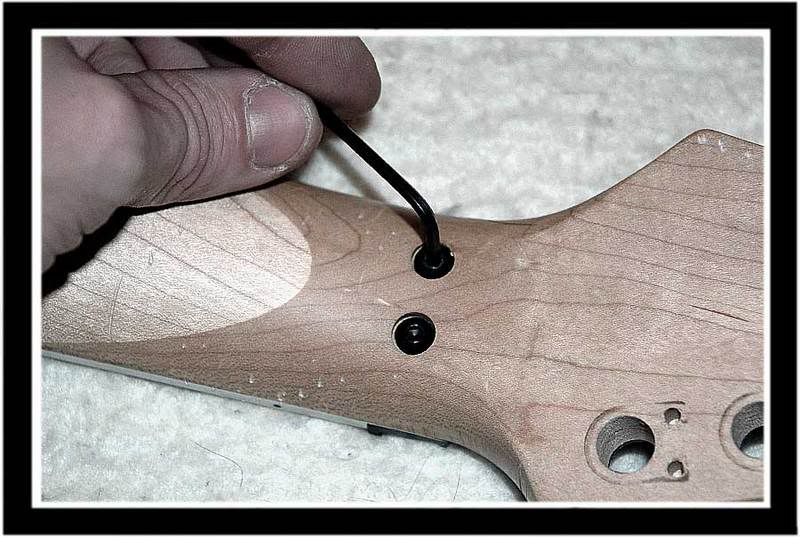
Just undoing the nut from one of the pots but c'mon... that's a neat ass pic
"Cutting the umbilical cord"
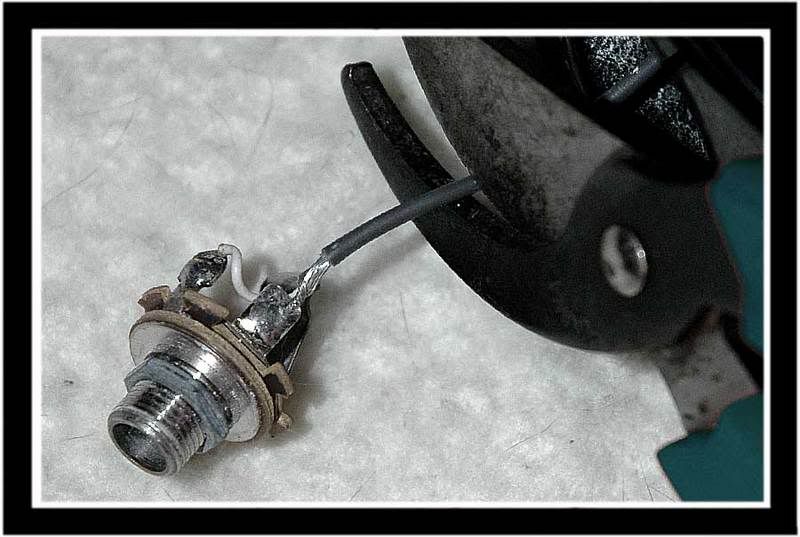
Kay, that's sort of funny & all, but I should mention that what I did here with the output jack was my solution to everything involving wires. (( go ahead you guys... laugh at the n00b. )) Not having a soldering gun and being FAR too impatient to wait until I bought or borrowed one or took the whole project to a friend who knows what the hell he's doing with wiring, I just took lots of pictures of the wiring setups and snipped everything I had to so that I could pull out all the electric dodads. As a final "failsafe" (( i hope )) I cut all my wires long on the pickup side, making sure to leave a small amount of the colored wire attached to the pots, switch and output jack as a final way of figuring out "what wire goes where" when I get to that point. Of course, I'll need to get a soldering gun for THAT. . . I don't think duct tape & twine will cut the mustard.
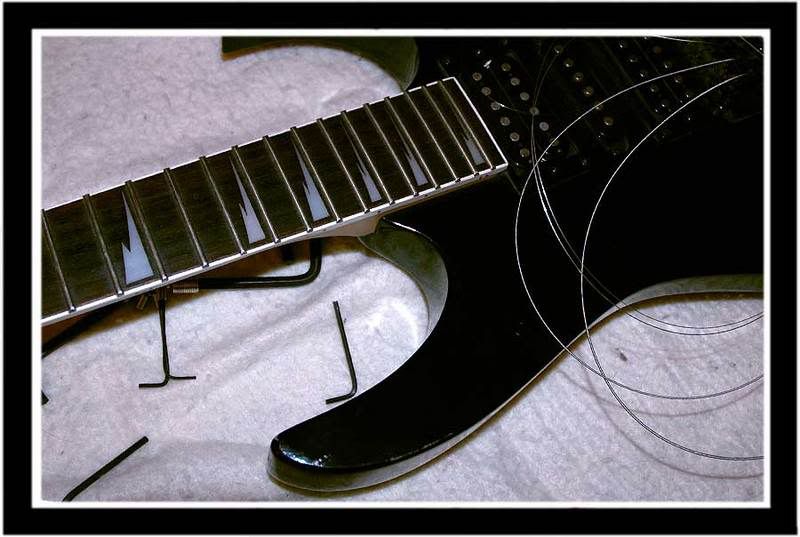
Un-SCREWING the "bolt-on" neck

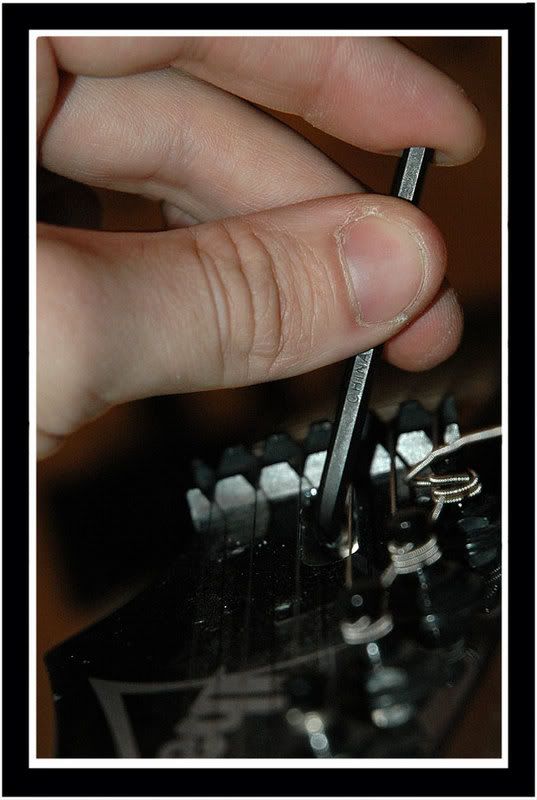
Allen-wrenching the locking nut right off!
"The Wire to Nowhere"

If you know electrical stuff, you know what this is. If you're like me and the extent of your skill at electrical repair is...
1)bully it into working by hitting or shaking the device
2)yellowpages. Electrical / Repair & Maintenance / Electricians
...then you might not know what this is at first glance without applying your highly-evolved primate brain and deductive reasoning or, alternatively, asking someone who's less of an idiot than we are. I opted for the first choice since no one else was around... but whatever works for you.
This is your "GROUND" It's what completes the electrical circuit allowing your guitar to make the noises you want it to make while, theoretically, keeping it from making the noises you don't want it to make (( buzzing, humming, singing like celine dion. )) You will notice that the ground wire is screwed directly into the wood of the routed pickup cavity with a wee little washer to increase the connection with the shielded paint. I haven't looked into shielded paint yet. I'm not sure what it's made up of exactly, but I'm guessing there's some sort of silver or copper dust mixed in with it to create the shielding. I'd dash off and Google it right now if I thought it was that important, but since I'll be re-shielding with copper foil, I don't really care about the chemical makeup of shielding paint.
56 parts
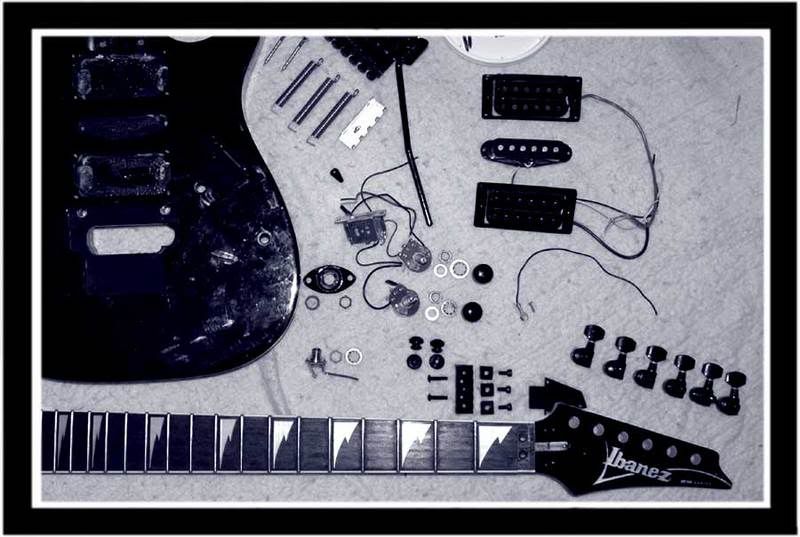
As the more knowledgeable/observant amongst you will realize, these aren't ALL of the parts. In total, there seem to be just over seven-thousand-million individual parts that make up the modern electric guitar when you count nuts, washers & the colony of screws required to hold it all together. Don't lose any!
Common Sense should tell you this, but just in case he's on sabbatical from your office this week, I'll give you an suggestion:
VADE'S IDIOT-TIP #1
When you sit down to tear apart a guitar, have ziploc bags, film canisters, little glass jars or some other small, seal-able storage containers on hand to store all your bits in until you need them (( to hand over to the guitar tech at your local music shop when you realize you bit off way more than you can chew. ))
Before I wrap-up for the day, I feel I should share some info I got from the always-helpful ((and extremely talented)) guys at the ProjectGuitar Forum. (( http://projectguitar.ibforums.com/ )) "Credit where credit is due" as they say. Here's the dealy-o:
When I removed the neck from the guitar body, I noticed that the construction & routing for the pickups & neck pocket was a bit different from other guitars I've seen (( or currently own parts of. ))
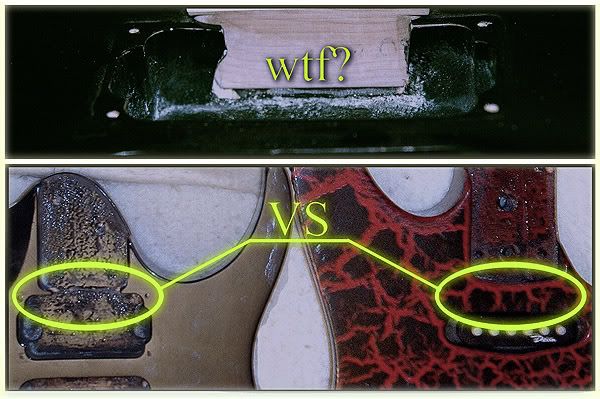
Concerned that this area had been designed to be too thin & that there was a "tear-out" during the assembly of my particular RG, I posted this image on Project Guitar's forum and made my inquiry as to how big of a problem, if any, this might be. Later the same day I had my answer; it's not a problem and is actually just part of the RG construction & design, so I won't be worrying about that at least! Special thanks to "RG Man" & the rest who filled me in & eased my fears.
So that's it for "Teardown."
Join us next time when Vade endevours to strip the factory paint from the body!
Tools suggested for this stage are:
-Large Phillips Head Screwdriver
-Small Phillips Head Screwdriver
-Set of Allen Wrenches* (or allen “keys” if you prefer)
((also called “hex” wrenches or keys))
-Wire Snips or Pliers with a cutter… you know the type
-Pocketed Apron (to make you feel like a craftsman. Also because I think it looks funny & cute at the same time. . . And also because it gives you a place to hold all your little bits while you work. Okay, okay, you don’t really need this at all but I impulse-bought one for like a buck and thought it actually came in pretty handy. Plus it’s white canvas so you can draw or write swear words on it.)
* a note on Allen Wrenches:
if you don’t have a set of these, consider taking your guitar with you when buying them to find what type you need via a test-fit in the tool department. There are two different types: “Metric” & “S.A.E” and wouldn’t you feel dumb if you bought one kind but get home to find you need the other? Gas-waster to boot. Knowing I would undoubtedly get the wrong thing, I strolled right into WalMart with guitar in hand (black leather jacket & sunglasses optional, but recommended if you like to get lots of interesting looks… it’s a winning combo) and fumbled with the different Allen Wrenches till I found what I needed. What I can now suggest to you is to ignore those really nice swiss-army allen wrench sets that keep everything neat, tidy & together. For most people, they’re likely worth the 5-15 bucks but while fitting for the various hexes holdng my guitar together, I realized that the handle of these nifty tools hinders (( at least in the case of an Ibanez RG )) access to the truss rod hex. So you’d basically buy this for your trem system and still need an ordinary set for your truss rod. The added upstroke here is that while these folding Hex Sets (which are either Metric -OR- S.A.E.) run upwards of three Lincolns, a 16 piece Hex Key set including both types was (( at time of writing )) a whopping 84 cents.
YOU do the math.
Off the bat, I removed the plastic cavity covers from the back since I’d already taken off the truss rod cover in WalMart.
And in the process of that, I was surprised to find that the cavity plate over the pots was shielded with a foil coat. Maybe not that big of a deal, but none of my basses ever came with shielded covers, so I thought it was a nice touch. Nice Work, Ibanez ((of Korea))!
Next, I loosened the tension on my truss rod. (( righty-tighty, lefty-loosy )) I don’t know that this is standard practice, but it seemed a pretty good idea prior to cutting all the strings off and eliminating the reverse tension on the truss rod in all of 4 seconds.
And speaking of string-cutting… that came next.
TWANG!
Heh heh heh…
And now I realize that every single thing I pulled out, lifted up, unscrewed or cut off has been photo-documented. But isn’t that kind of boring? Do you really need me to say “Next I did this” and “Next I did that” for everything? Probably not. I bet you’re a clever little monkey.
I’ll tell ya what. Let’s split the difference, shall we? I’ll put up some of the better pics and caption them and you’ll be grateful that I actually found a way to be a little less verbose for once. (( don’t get used to it. ))
Removing trem-springs after loosening metal plate
Lots of tiny screws... this one holds the pickup selector switch
Just undoing the nut from one of the pots but c'mon... that's a neat ass pic
"Cutting the umbilical cord"
Un-SCREWING the "bolt-on" neck
Allen-wrenching the locking nut right off!
"The Wire to Nowhere"
1)bully it into working by hitting or shaking the device
2)yellowpages. Electrical / Repair & Maintenance / Electricians
...then you might not know what this is at first glance without applying your highly-evolved primate brain and deductive reasoning or, alternatively, asking someone who's less of an idiot than we are. I opted for the first choice since no one else was around... but whatever works for you.
This is your "GROUND" It's what completes the electrical circuit allowing your guitar to make the noises you want it to make while, theoretically, keeping it from making the noises you don't want it to make (( buzzing, humming, singing like celine dion. )) You will notice that the ground wire is screwed directly into the wood of the routed pickup cavity with a wee little washer to increase the connection with the shielded paint. I haven't looked into shielded paint yet. I'm not sure what it's made up of exactly, but I'm guessing there's some sort of silver or copper dust mixed in with it to create the shielding. I'd dash off and Google it right now if I thought it was that important, but since I'll be re-shielding with copper foil, I don't really care about the chemical makeup of shielding paint.
56 parts
Common Sense should tell you this, but just in case he's on sabbatical from your office this week, I'll give you an suggestion:
VADE'S IDIOT-TIP #1
When you sit down to tear apart a guitar, have ziploc bags, film canisters, little glass jars or some other small, seal-able storage containers on hand to store all your bits in until you need them (( to hand over to the guitar tech at your local music shop when you realize you bit off way more than you can chew. ))
Before I wrap-up for the day, I feel I should share some info I got from the always-helpful ((and extremely talented)) guys at the ProjectGuitar Forum. (( http://projectguitar.ibforums.com/ )) "Credit where credit is due" as they say. Here's the dealy-o:
When I removed the neck from the guitar body, I noticed that the construction & routing for the pickups & neck pocket was a bit different from other guitars I've seen (( or currently own parts of. ))
So that's it for "Teardown."
Join us next time when Vade endevours to strip the factory paint from the body!
Labels: customization, customize, DIY, funny, guitar, how-to, ibanez, modding, projects, refinishing, RG, setup, vade, vadeking
posted by Vade at 11:45 AM
6 comments
![]()
![]()